

Renovating old homes is magical. When you’re designing a brand new home, anything is possible, but I admittedly love the challenge of working with older homes. You never know what you’ll find when you open the walls or what curveball the structure will throw you, and the creativity and problem-solving that goes into a renovation {especially one in a 100+ year old home} is just second to none.
With this home, the owner wanted the new bathroom to feel like it had always been there but with new life and air breathed into it. It had previously been (poorly) renovated in the 80’s with murals and the yellowest of lacquered brass, and it wasn’t living up to its full potential.


Even though the space was tight, there was hopes of being able to fit a clawfoot bathtub in the space. Previously, the entrance into the suite from the hallway went right through the bathroom. Yup - you read that correctly! In order to get to the bedroom, you had to first walk past someone going to the bathroom.

I spy with my little eye…
So, we set out to see what our options were for layout, and through an exploratory space planning phase, we came up with a five. Some were certainly stronger than others, but sometimes we also like to show a client what DOESN’T work. Ultimately, the homeowner chose layout #2.

We began the process of designing the 1920’s Tudor bathroom to stylistically match the architecture and time period of the home but without feeling dated. Our first go-to was William Morris’ iconic strawberry thief print. Inspired by birds constantly stealing fruit from his kitchen garden, he used the painstaking indigo-discharge method, and this pattern was the first design using the technique in which red and yellow were added to the basic blue and white ground. While it was popular in cotton upholstery in the early 1900’s, it has since been introduced into wallcoverings and even tile mosaics.


The homeowner was excited about the idea of a high-tank toilet rather than a traditional toilet we see in the United States these days. It was the first time I’ve included one in a design!
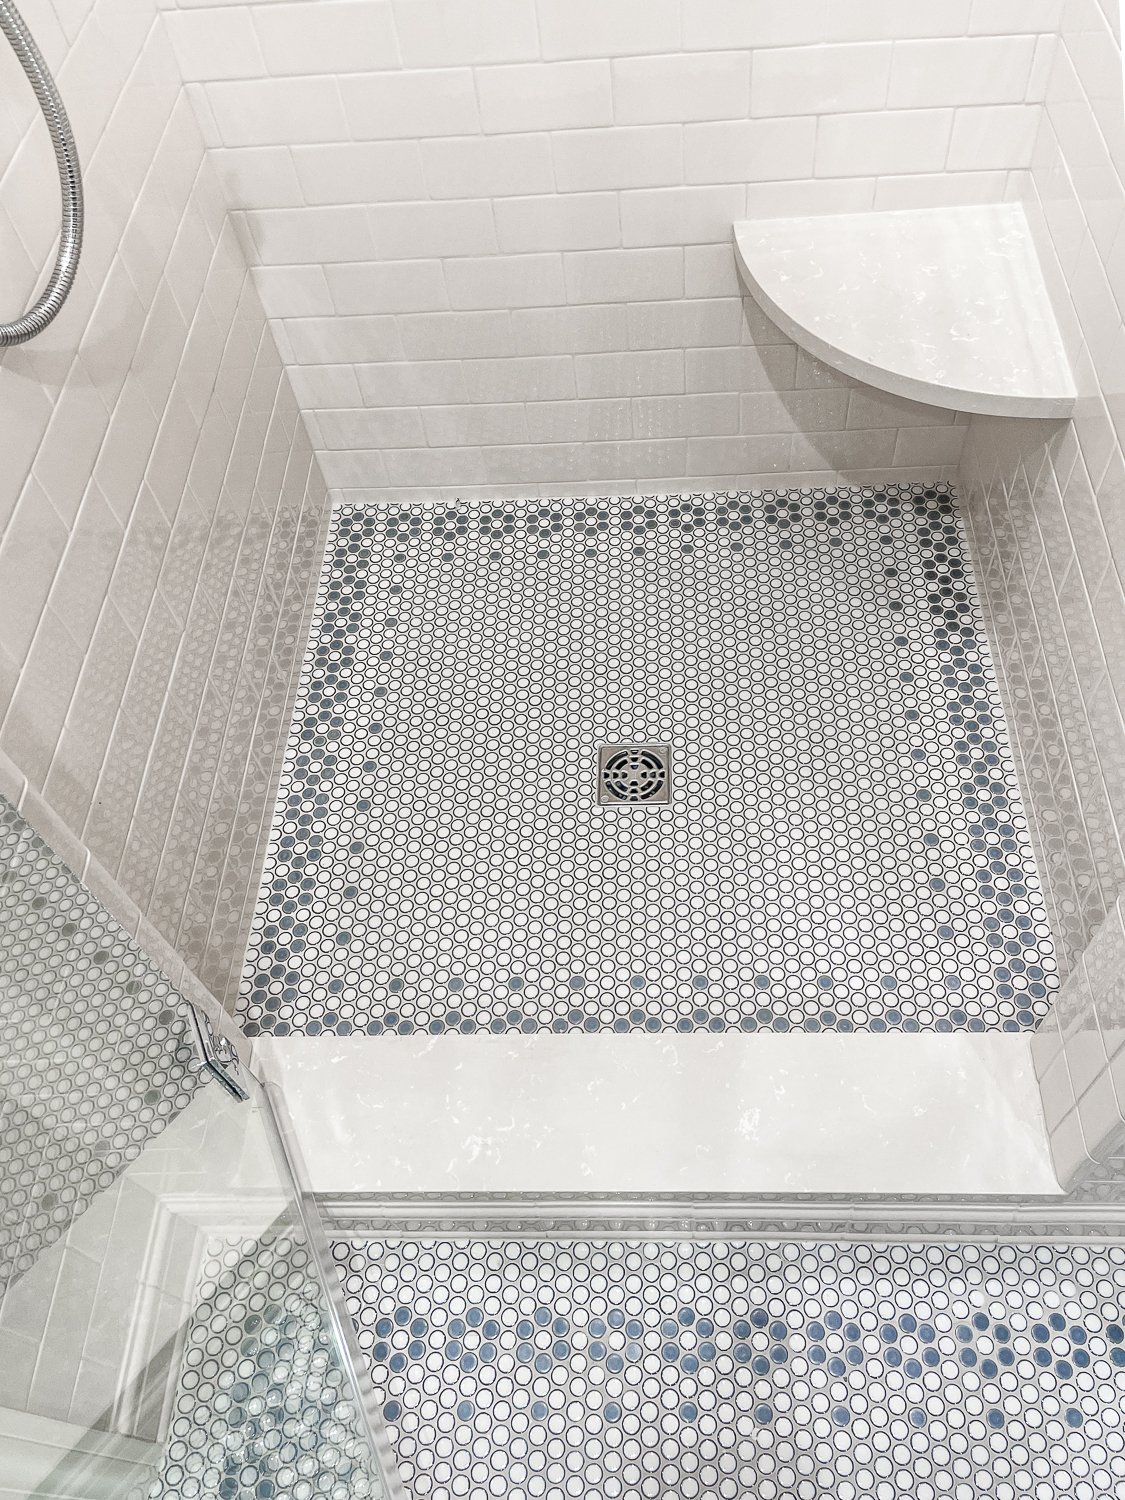
Next, we wanted to design tile patterns that felt historically accurate. We opted for Ann Sack’s MADE collection which has endless tile profiles and beautiful color options. While the subway wainscoting looks simple, the angles of the architecture and shape of the room led to many challenges in achieving this look, and it ultimately took 12 different tile profiles to achieve the patterns you see. So much care and love went into designing this room, and I think it just may be the most detailed bath I’ve ever designed.


My favorite thing about how this space came together is just how well it represents the homeowner and just how little it represents me as the designer. Very rarely do I get to design a home that is truly my own style, and when I say “a home should not be a mirror of the designer but rather a reflection of the homeowner”, I wholeheartedly mean it. The homeowner found this Red Dragon granite and fell in in love, so we opted to incorporate it on the vanity. In the shower, we went for a much more muted ivory solid surface for the bench to tie in with the tile walls.

Each one of these blue penny tiles was individually laid into the ivory mosaic to create the border around this space.


This clawfoot tub is perfection. I’m so glad we were able to fit it into the space (it was quite literally down to the inch with achieving enough clearance in the hall and shower to meet code and leave enough space for the tub)! On the wall adjacent, we included a train rack shelf and a towel warmer which paired perfectly with the heated floors.


The shower incorporated a built-in shampoo niche, bench, and stunning Rohl plumbing fixtures, and the tile pattern continued onto the floor. In my slightly biased opinion, the handles on the euro-style glass enclosure are to high for!


With impeccable craftsmanship, this glazed, custom Habersham vanity was the perfect statement piece that the room needed and visually balanced the ivory tiled walls.

In the closet, we had our work cut out for us! Talk about angles… It was already a narrow space, but the architecture, window, and radiator weren’t doing us any favors in terms of maximizing it. However, we made the most out of every inch (not shown are 6 additional wall hooks for scarves and purses).


This was such an amazing project to design and see come together. It wouldn’t have been possible without the incredible talent of the team involved:
Builder: Scott Christopher Homes
Tile Installers (more like artists): Certified Installers
Painters: Hedke Painters
Wallpaper Installer: Bob Schipper
Vanity: Habersham
Tile: Ann Sacks
Plumbing: Rohl and Victoria + Albert
Countertops: Great Lakes Granite / Mont